Over the past few years I’ve been busy with Snow Queen Ranch renovations and decorating a new mountain condo. Each property has it’s own distinct personality. It’s the little and big details that make all design projects exciting. I’m forever grateful to my pro team of contractors and subs, without them none of this would be moving along the way it is. With my overall vision, we all work together to make everything come together. They handle the big stuff & I take the reigns on bits & pieces that make the vision come alive. I love adding metallic details to frames, mirrors, furniture etc. A little gold, silver or bronze adds so much dimension to home decorating.
Though the years I have found favorite paints and techniques that I wanted to share with those of you also interested in home improvements and DIY projects.
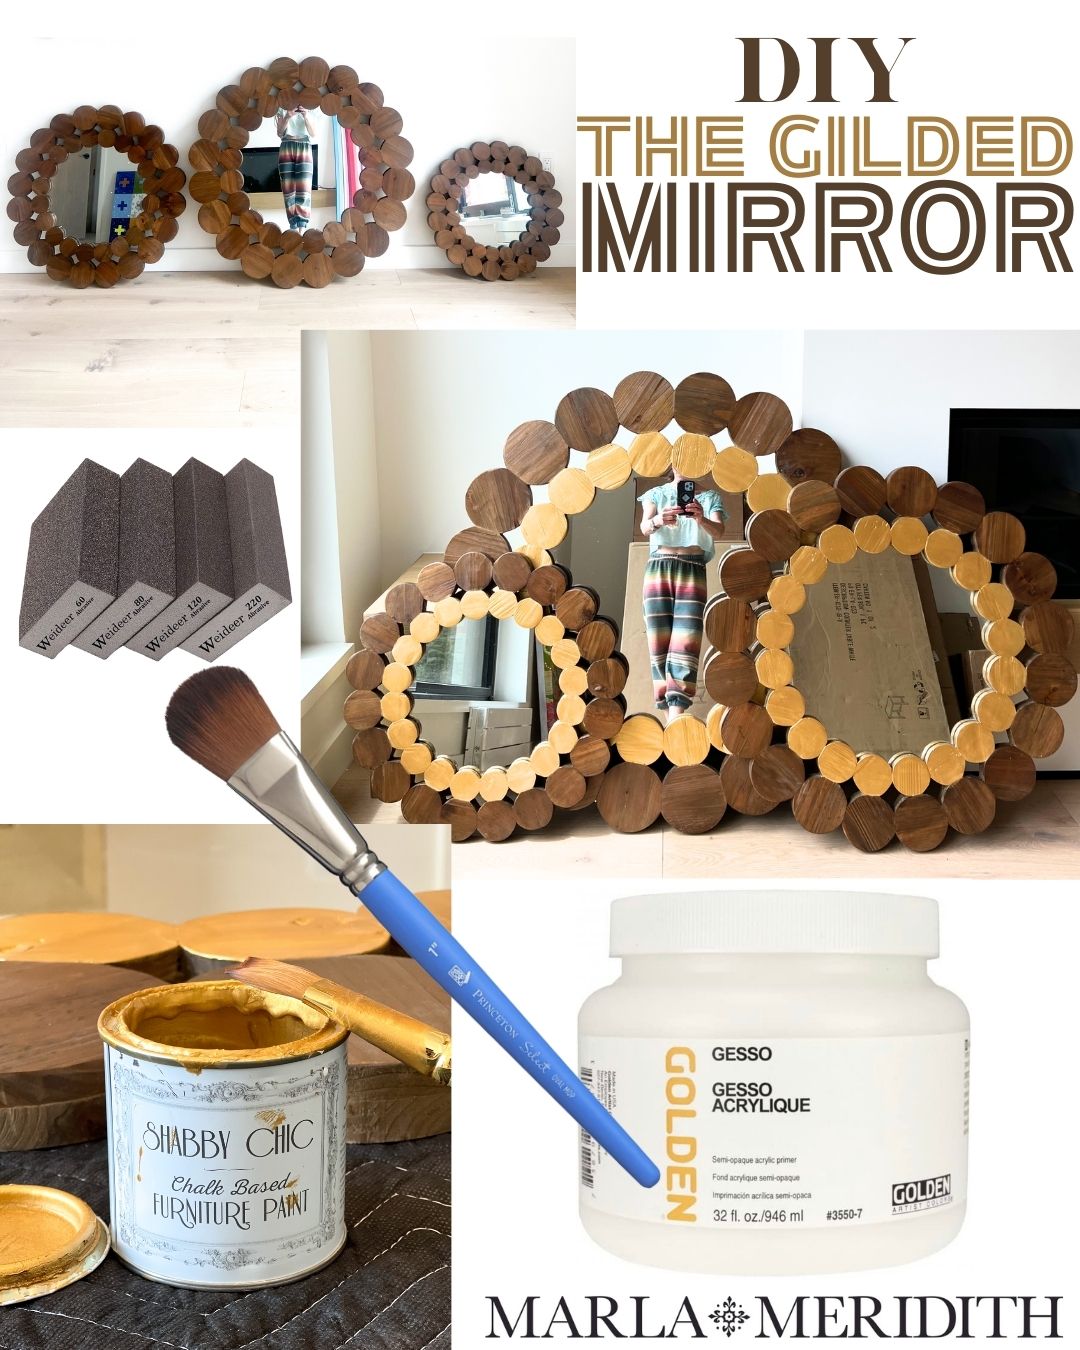
In a few quick steps you can add some metallic or any other color to wooden objects.
- Choose the piece you want to paint I just love these contemporary rustic round wood mirrors. I purchased the three sizes to have over a king sleeper sofa.
- Lightly sand the surface This will take off any residue or pre painted surfaces so you have a clean palette to work on. Brush off the dust when you are done.
- Paint the sanded surface with gesso or primer To get the best results with your color it’s best to prime the surface so any other colors or stains don’t bleed through.
- Paint with your desired color After your primer has dried it’s time to paint a few thin coats of your chosen color. Make sure each layer dries completely before adding a layer. I always have excellent results with these chalk paints.
See below for all the products I used for this project. Happy painting!